This Website!
Dec 2025
A custom designed and coded portfolio website. The backend uses a specialized Flask web server, and its frontend is made up of Jinja templates. This site follows my adventures in 3D printing and CAD, coding, rocketry, and photography. It also includes some of my for-fun projects, like my automatic reading log! It's one of my favorite things I've ever made, and I've spent quite a bit getting it to work and look as well as it does.

Goals
I started this project with a few clear goals in mind. While these certainly changed as I worked on the site, below are the most important ones, that I was working towards when I started:
- Good UI/UX - must look modern and professional, with intuitive navigation and easy-to-find pages
- Easy to add content - no Git commit should be necessary to add another project or review, ideally it should all be through a web interface
- Clean file structure and code - files should be well organized and code should be mostly easy to read (to allow for later changes)
- Hosted reliably - needs to be active 24/7, with me being notified if it goes down
In addition to these goals for the website, I went into this project with the aim to learn as much as I could about the workings of the internet, how to create code for custom frontend and backend systems, and how to make an intuitive and modern UI and UX.
Prior Work
I started learning about the frontend of websites a few years ago, mainly inspired by the youtuber Hyperplexed (who has some incredible videos about frontend development). This led to me making a couple very basic CodePens (a website where you can create mini single-page projects with HTML, CSS, and JS), and later some more well thought-out website demos. I don't think any of these are worth putting up here, but they were really great to learn frontend, and how to deal with some of the intricacies of using HTML and CSS. Most of these did not use any JavaScript (as it seemed a little scary to me at the time), but I was also working on a few Python projects so I understood the ideas behind actual code.
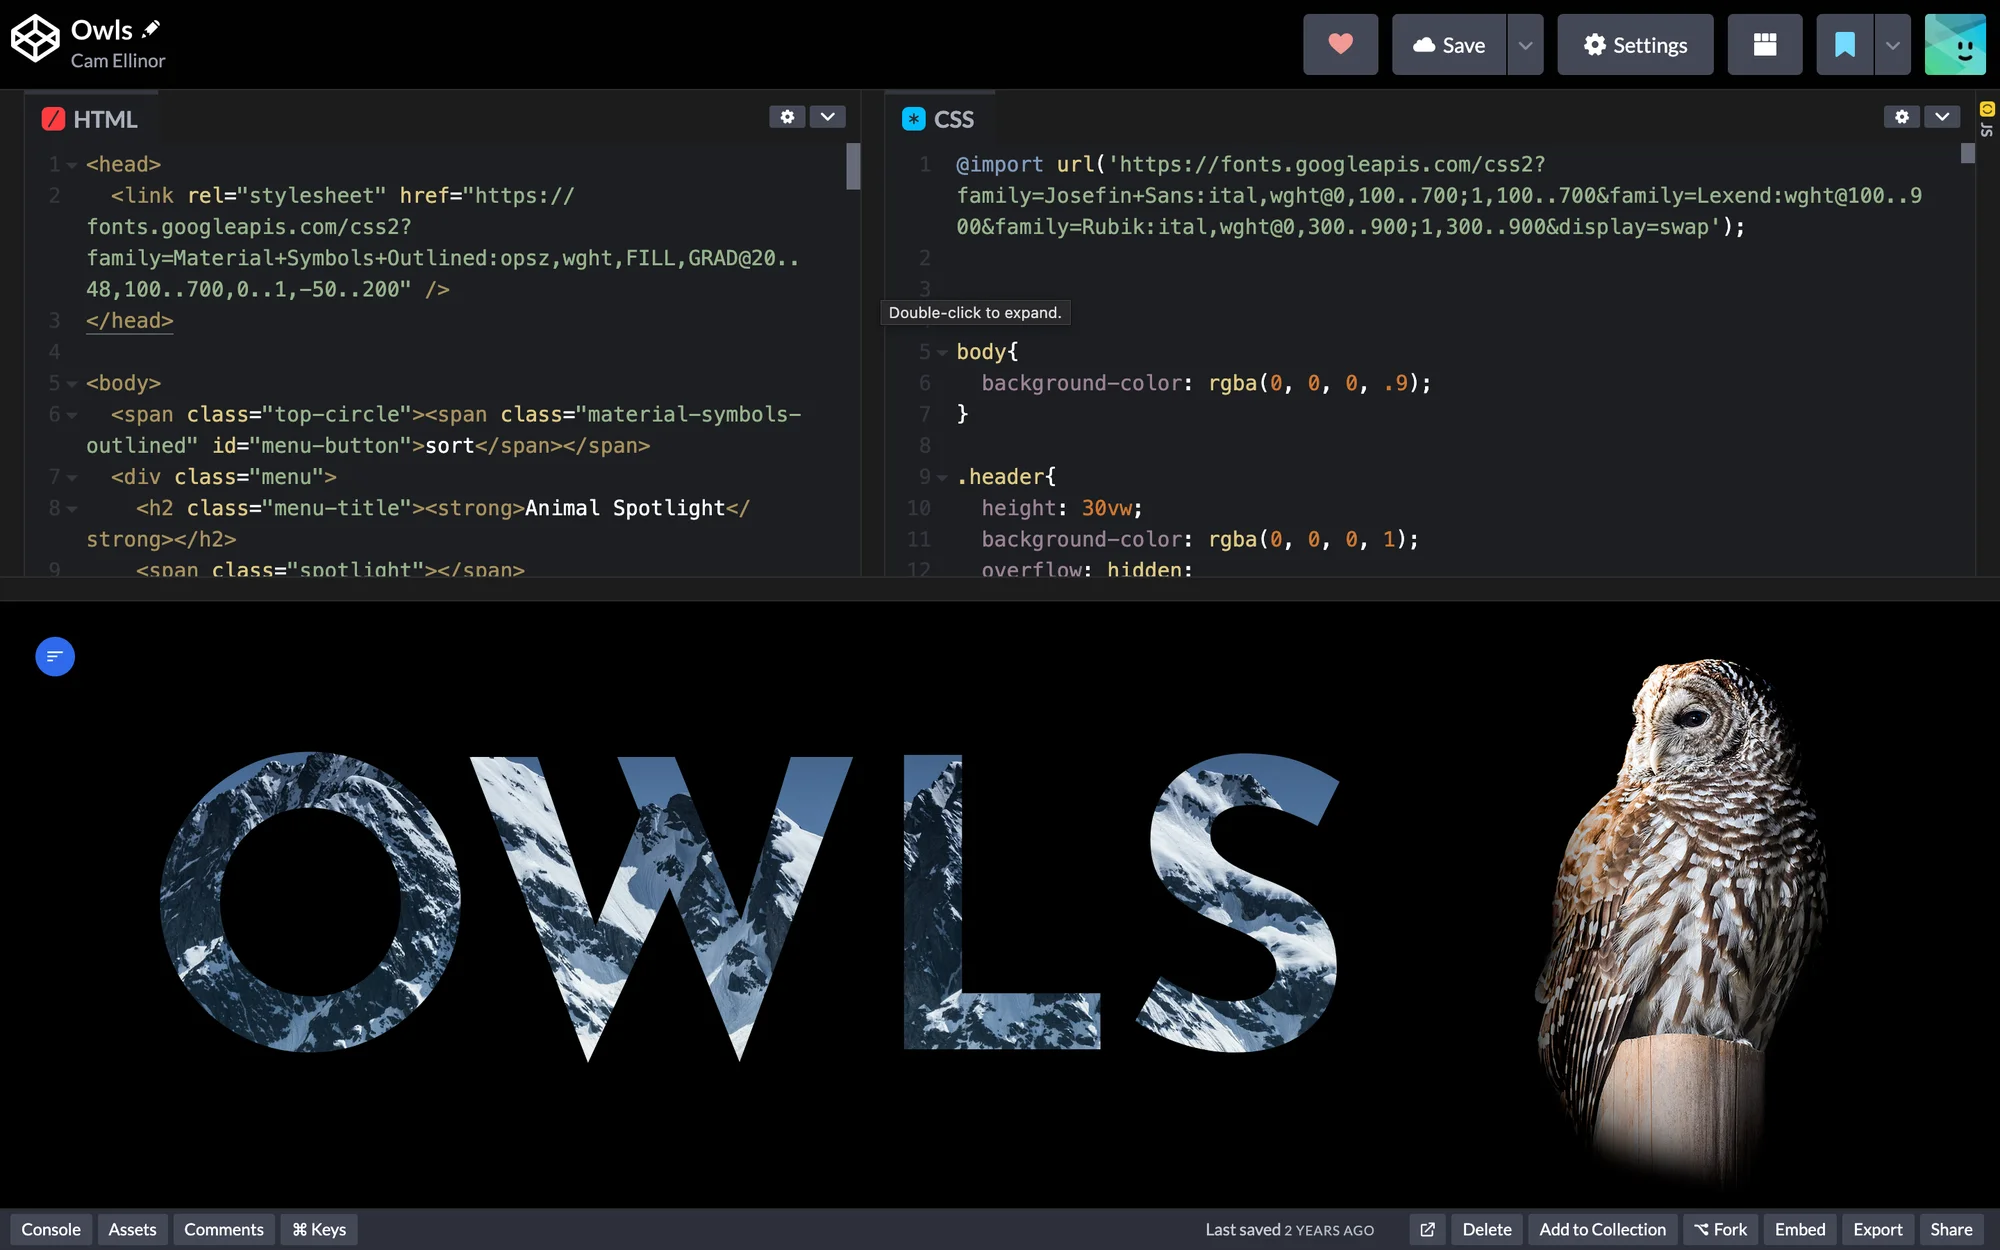
One of my earlier CodePen projects from 2024
Over this past summer (of 2025), I completed the Harvard Online Extension School's CS50x, an introductory computer science course. While I knew most of the fundamentals of the course (like logic basics, Python, and the HTML/CSS), a lot of it was new to me. One of the most interesting things discussed was the use of a custom Flask server (the backend of a website), SQL database, and website frontend, to create a complete and functional website. This was really cool to me, especially how I could create a website backend in Python, language I was already familiar with. Seeing how the server could act as an intermediate between a database and a user was very interesting, and I knew I wanted to go deeper with these ideas. I'd wanted to make a portfolio website for a while, and had already started one with a node.js backend. However, it was clunky (not using proper databases, for example) and I didn't really understand the ideas behind it, so I decided to start over. I pulled some of the HTML and CSS from the old one, and started work on one built with Flask.
Design & Frontend
This section and the backend one are more based on the final (ish) site, rather than the creation process (if I talked about each choice/step in development, we'd be here for a while).
Aesthetics
The design for this website is based on a lot of concepts seen in modern website design, such as a clean nav bar, simple scroll effects, and colorful gradients. I chose to style everything in only a dark mode, mainly because it's my preference for websites and I didn't want to have to re-style all of it for a light mode (which I also think wouldn't fit with the feel of the site).
I use the same purple and orange gradient (custom made by layering css radial-gradient) for lots of elements around the site, most clearly displayed on the landing page. Occasionally layered on top of the gradient (and also used separately in places) are some repeating diagonal stripes, which I think gives a nice texture to buttons and other elements.

The full gradient used across the site
I tried to make all the navigation as clear as possible to any visitor, with as few items as I could in the nav bar. There are subtle hover effects on all navigation elements (and other clickable items), which I felt looked nice enough and was not distracting.
Typefaces & Icons
My two font families are pretty basic:
css
--title-font-fam: Lexend, Jost, Montserrat, Arial, Helvetica, sans-serif;
--p-font-fam: 'Red Hat Text', 'Gill Sans', 'Gill Sans MT', Calibri, 'Trebuchet MS', sans-serif;
Most fonts and all icons are sourced from Google Fonts. Font families are used in CSS to make a 'family' of usable fonts. The first font takes priority, but if it fails to load then the browser falls back to the next fonts, from left to right.
Lexend and the rest of the title fonts are simple and highly geometric sans-serifs, and are generally used with quite thin weights (although a couple of the smaller titles are bolder). The paragraph fonts are also sans-serifs (it's hard to get a modern looking serif), but a bit more legible for larger chunks of text. I liked Red Hat Text most, as it is much easier to read than Lexend. In fact, you're reading this in Red Hat right now!
There are a few icons on the site, mainly for navigation (for example, back buttons like the one on this page), but I tended to use text instead of icons in most places for increased clarity. However, one of my favorite parts of this site is made with icons: the transition from the hamburger menu button to close button when the expandable nav menu is opened/closed (only visible on mobile).
Frontend
The frontend system uses Jinja as its web template engine (as it is integrated into the backend system that I use). A template engine allows HTML pages to be generated based on data from the server. Essentially, it is what allows the site to have dynamic pages (in the sense that I can upload a new project/launch/other and the page will update on reload), meaning I don't have to edit the code for each page if I want to add new content. I use a layout.html page with the navbar, title/subtitle, footer, and general styles (included in a linked css file in the layout). These files use the file extension .html just because that's how I started doing it, even though .jinja would technically be better (as it's not running HTML code). Often, the server passes lists (generally of python dictionaries filled with the content) into the templates for dynamic pages, then a Jinja for loop iterates over each list, making chunks of HTML with the content given.
Backend & Data Flow
The Web Server
This website's backend uses a custom Flask web server. A web server routes each HTTP request (for example, putting a URL into your browser sends a GET request to that server for the specified URL), then returns something depending on the type of request (like a webpage or JSON data). For each of these routes (the name for a function that routes an HTTP request and returns something), the server can do any processing necessary before serving the page. It then passes this content into the Jinja templates I talked about above. Many of the dynamic pages store data (content) in an SQLite database, so the web server requests this content from them before serving the page. I'll get into more of the details of how this system works below.
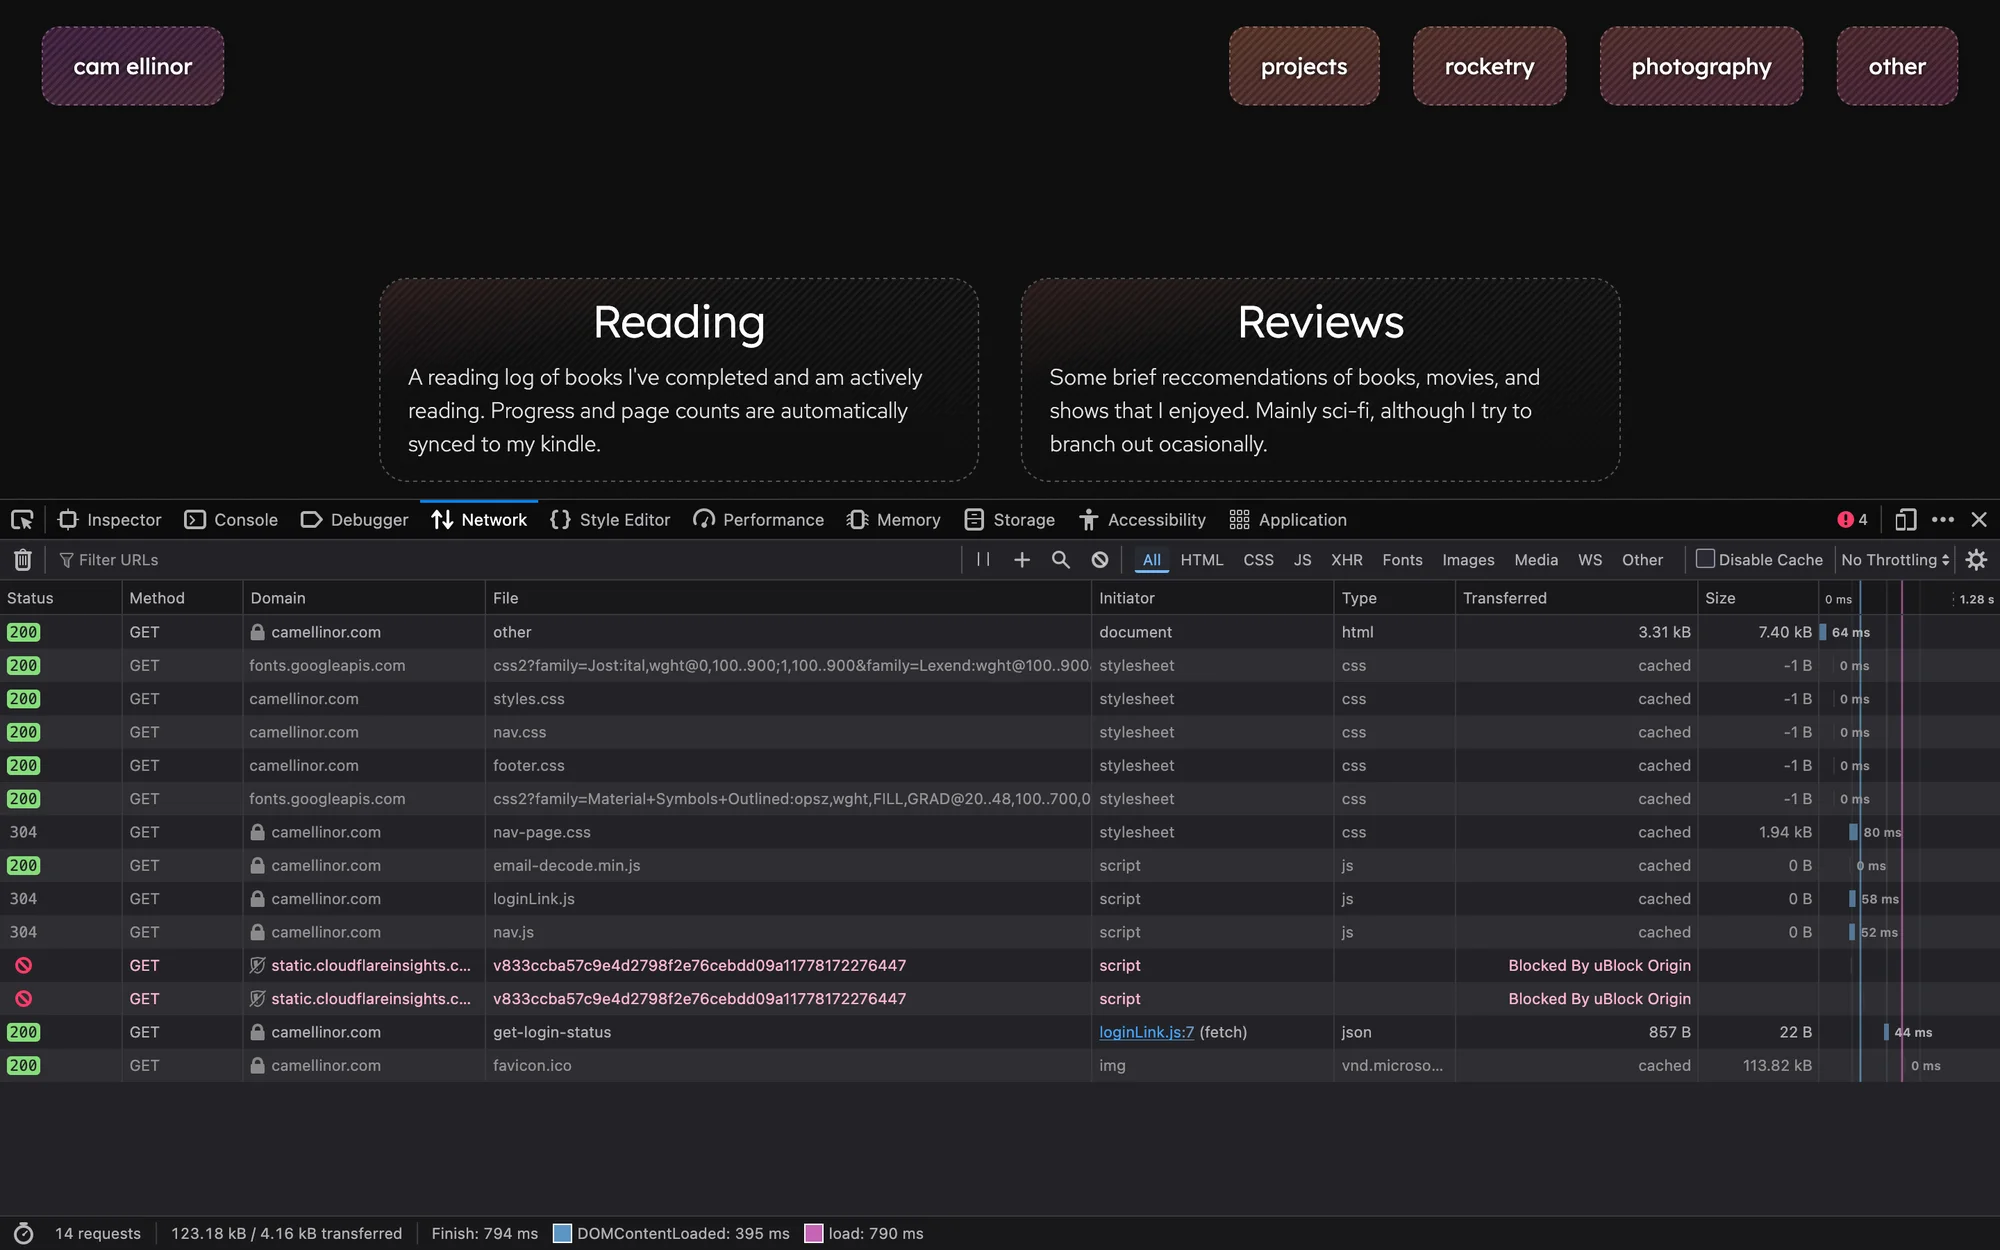
The network tab of developer tools, showing all HTTP requests sent for the 'other' page
Login System
In order to fulfill the goal of having an online interface that allows me to add projects, photos, reviews, and anything else I wanted without touching the code, I decided to use a similar system that CS50x taught about. I knew I would need a login system, which I built mostly from scratch using Flask sessions. Once a user goes to the login page and logs in, the username and password are both put through a hashing algorithm (using the hashlib library), and if they match a pre-hashed key (no reason to use a database for this, as it is only intended for a single admin user to log in), a login session is stored as a tamper-proof cookie on the client. Flask sessions are unable to be modified without the secret key, making them perfect to store a login (although they should only store if the user is logged in, not login information, as they can still be read).
Admin Pages
Then, I started to think about the admin systems. Each dynamic page (like projects) has an "admin page," which is only accessible if logged in. This is the web interface where I can update the content for a page, like uploading a new project or changing an image for a review. Each page has a slightly different system and page, depending on what content the page needs. I get into the actual differences between pages in the next section (called Pages). Generally, there are HTML <input> fields, which take in text (like titles and descriptions), dates/times (like the date of a rocket launch and time of each flight), files (like a book cover for a review), and a bit more. JavaScript eventListeners detect any changes in these fields, which send a POST request to the server including all the content that was changed.
I'll go through one example of how the Reviews system works here, but it is slightly different depending on the page that is being updated. I just updated the title of a review, and the browser sent a POST request to the route camellinor.com/reviews/edit/r-7-content_title/update. All of the admin things for reviews are done under the URL camellinor.com/reviews/edit/, which goes to a specific route in the web server. Then, the server split the r-7-content_title part by each dash, giving r, 7, and content_title. Each of these tells the server exactly what to update. The r represents the table of the database to update (essentially confirming that it's a review; this section is only really important for launches, where l means launch and f means flight). The 7 is the ID of the review (all databases give a unique ID to each row, which is used to clearly communicate which row should be updated). content_title is the exact name of the database's column that should be updated. These column names are checked against a dictionary of acceptable ones (hardcoded into the python server) in order to prevent any SQL injection or other attacks (not like I'm expecting anything, but it's worth the five minutes to do). The server then updates the exact entry in the database, replacing the old one with the new content (which is stored in the request's body).
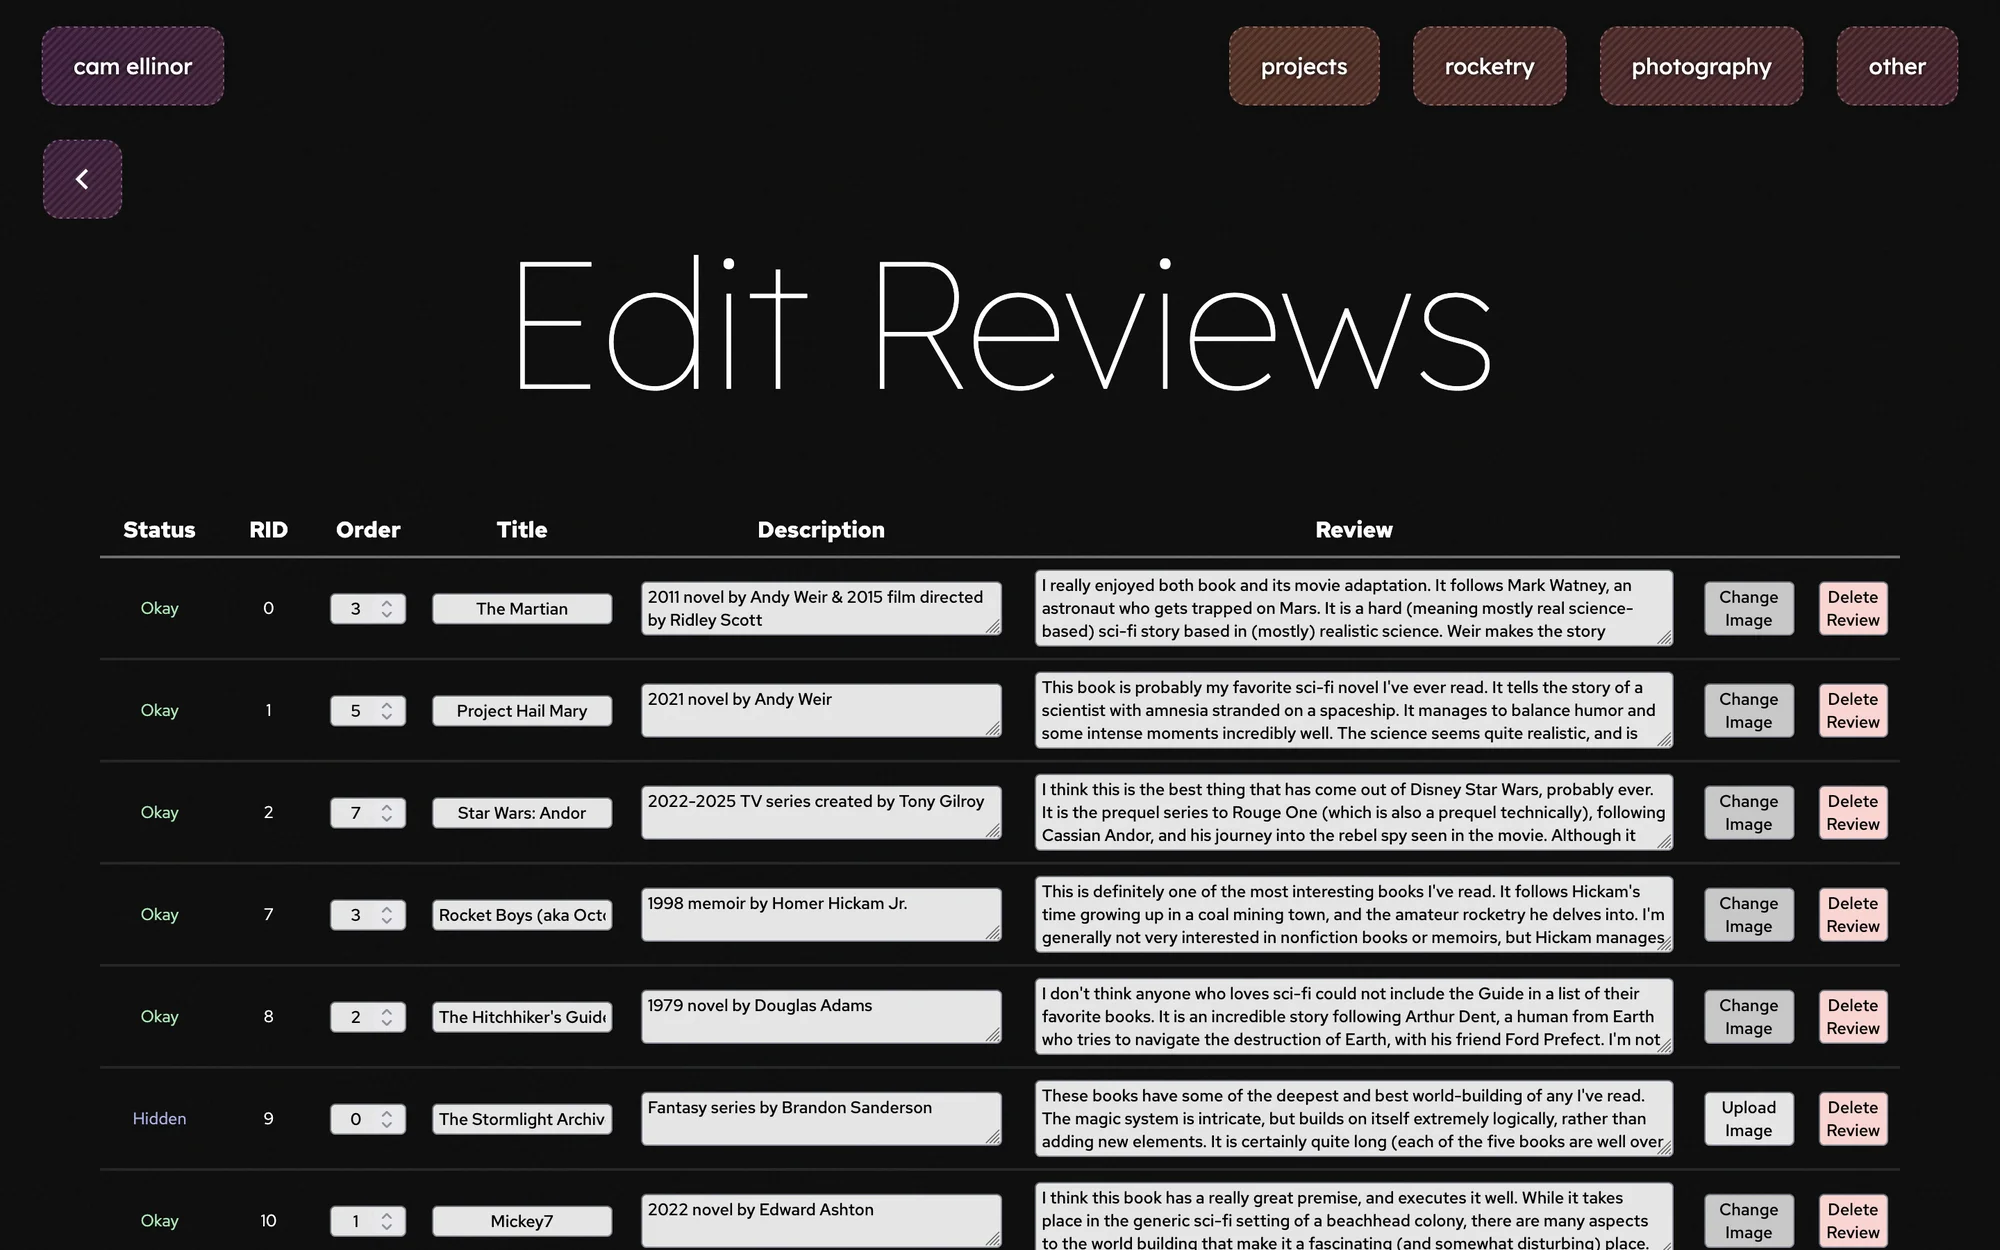
The admin page for reviews, accessible after login
In terms of styling for the admin pages, I tried to keep them consistent and clean, with user friendly elements (such as a 'Database Updated!' popup whenever the page gets a successful response to a POST request). Although it is likely I will be the only person to ever use these pages, I think it was a useful exercise in making a reliable (and user friendly) page to update a database.
Databases & File Storage
There are 6 SQLite databases (as separate .db files), one for each dynamic page. Most of them have a single table (I'll get into the specific schema for a couple later), but a few of them are more complicated. I am using sqlite3 to execute queries.
My file structure is a little bit of a mess, as I had no exact plan for my navigation, and therefore organization. Databases are stored in a general /databases folder, and all JavaScript and CSS files are stored in folders inside of Flask's /static folder. Templates are organized by section of the website (for example, all photography-related pages are kept in the same folder). Besides these, a bunch of other folders are in the root dir, mainly for storing things like flight data and images. Each of these has its own HTTP route, in order to serve the correct file according to how it is stored.
Backups
Because I host this site on a Raspberry Pi (which I will talk a bit more about later), I was a little worried about losing all the data on it. I wanted all of data to be stored redundantly, ideally in the cloud. This led me to start developing a backups system, which saves a copy of these folders: {'databases', 'projects', 'archive-data', 'cover-cache', 'review-images'}. These are saved in a backups folder, which itself is backed up to Google Drive every night. Most of the taken up space is from the images in each project, but those are compressed to .webp with 2000 px max per side. Besides those, the databases and markdown files themselves are very lightweight; in total, each project blog adds around 5 MB to the backup, which is totally manageable. Backups can be created manually on the webpage, but I have also set up an automation on my phone which sends a request to create a backup, and gives me a nice notification if the response is successful. This runs weekly, and I have simple 'ping' automations running daily, so I will know if the site is ever down.
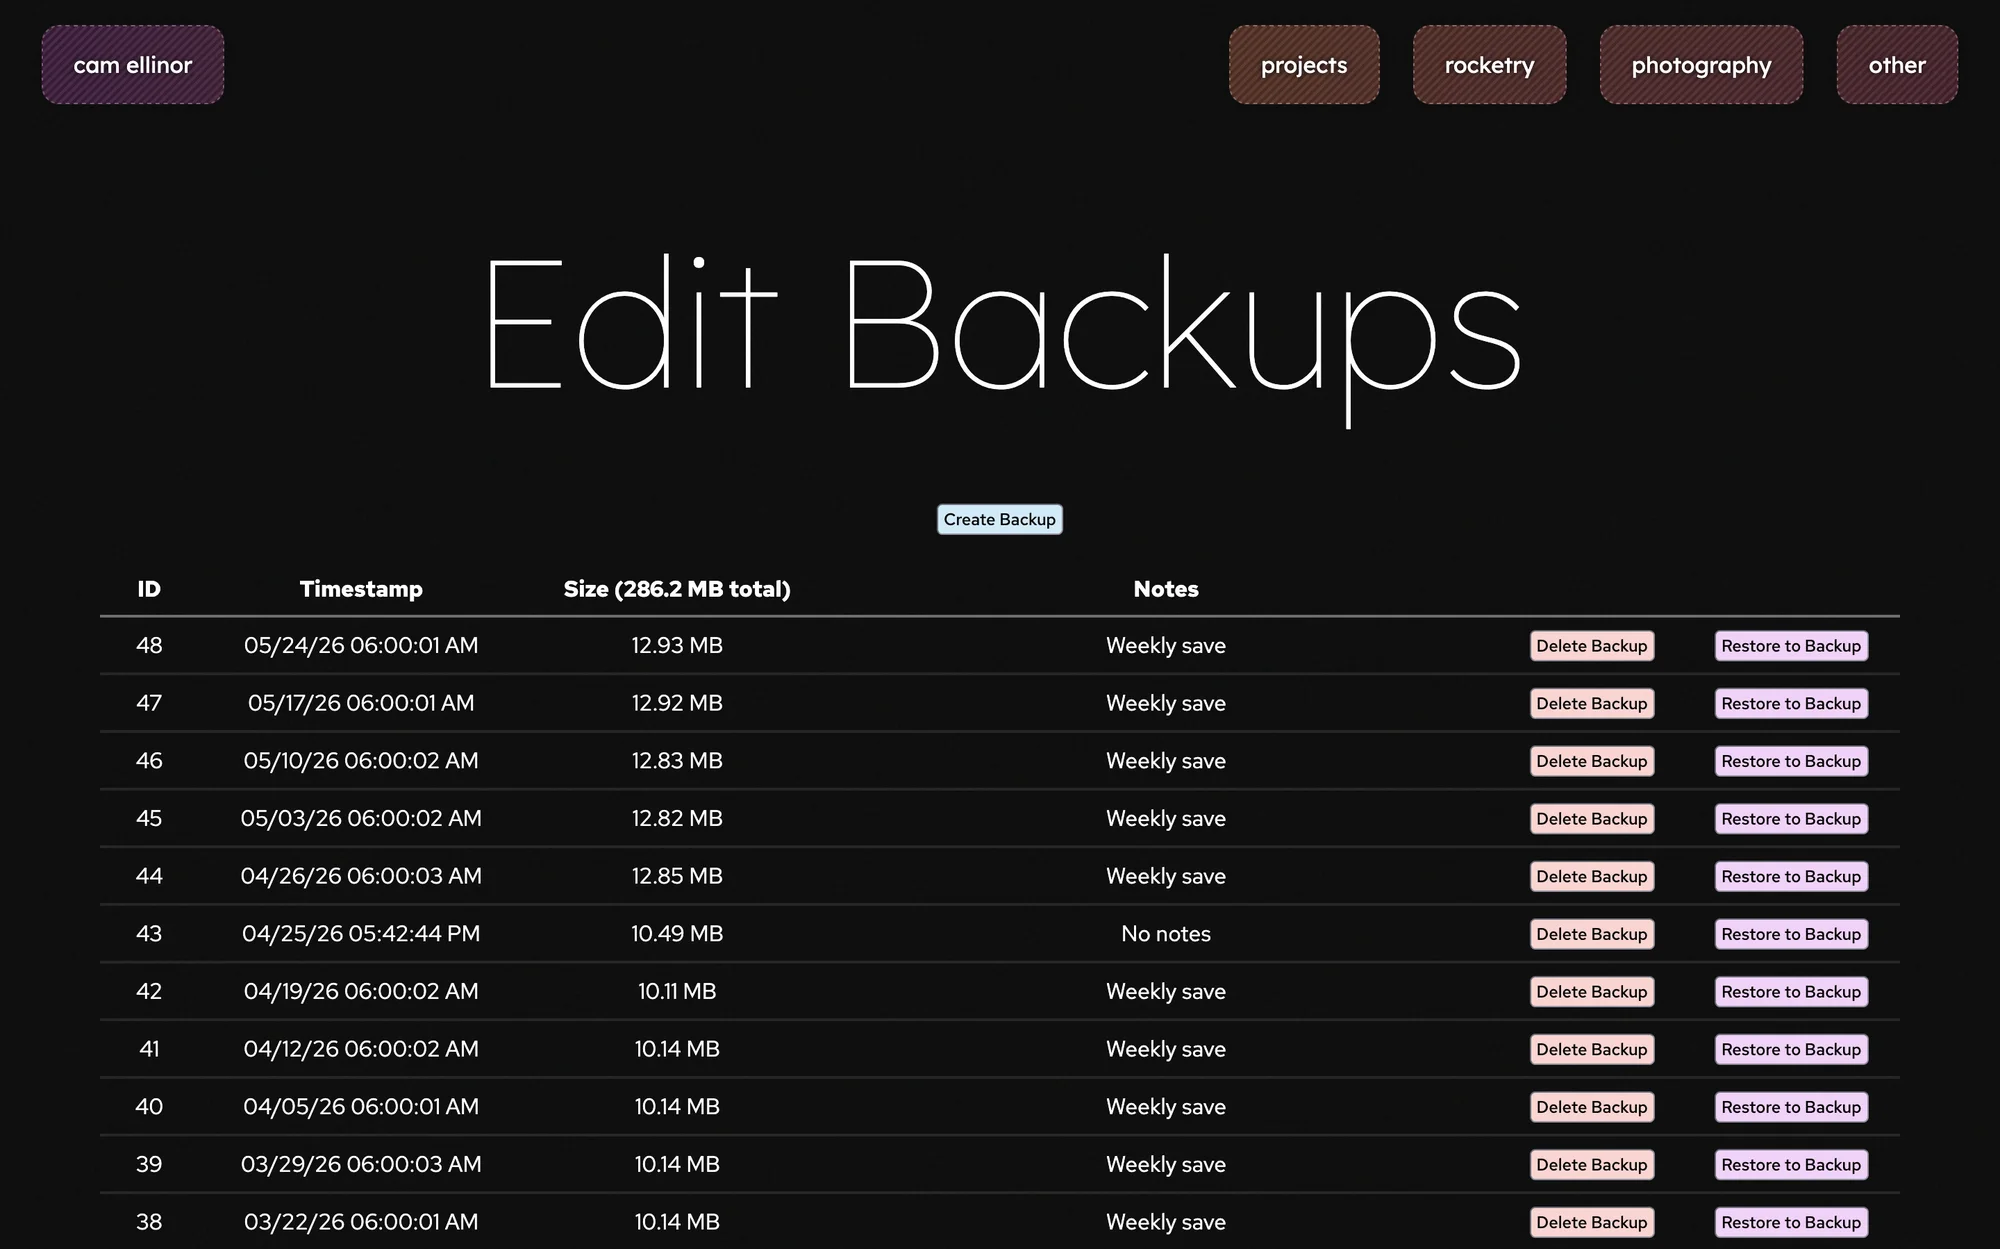
The backup management page
For each backup, I have a 'Restore to Backup' button, allowing me to replace all the current data (projects, databases, etc.), with the old data. It essentially just goes through each backed up directory, deletes the current one, and copies the files from the backup to where the old directory was. The server also saves a 'Pre-restore' save and keeps the restored backup, so backups are never permanent. When creating each backup, each file is looped through, in order to approximate the size of the backups.
Pages
This section is in order of complexity of each page, rather than development steps or how it appears on the website, just in an attempt to make it slightly easier to follow.
Launch Archive
Nomenclature note: I am using two similar terms for two different things in this section (they are generally interchangeable): launch refers to a full day, going out to the field and sending off multiple rockets, while flight refers to each time a rocket flies that day.
The launch archive is the most traditional form of viewing data: a big table. It has a main page with a list of launches, and each launch links to a table of flights. Launches and flights are stored in two different tables in the database, and have some basic details. Each launch has date and location, along with a general goal of the launch. The page for each launch can have an image, and has the time, rocket name, motor, apogee, and other notes for each flight in a table.
I'm not going to talk much about the general rocketry page here. it's the same exact design as the projects page, but the content is hardcoded (because I'm not planning on updating it nearly as often)
Photography
The photography section is quite similar to the launch archive, but laid out much more nicely. It has photos sorted into collections, comparable to flights and launches. However, each photo can be stored in as many collections as desired.
The photos themselves are just uploaded into a single large folder, renamed to their ID and converted to WebP. Two copies of each image is stored, one full quality (generally 4-6k) and one scaled down to a maximum of 2000 px. Each photo is stored in one table in the photography database, mainly storing their ID and any metadata the original image had (as the conversions get rid of most metadata). Collections are stored in another table, including a 'thumbnail' image ID, which is the image shown for that collection on the main photography page. A third table is used to 'connect' each image with one or more collections, with one row of the table having one photo's ID and one collection's ID. Then, when someone goes to a specific collection's page, the server just finds and returns every image that has a connection between it and the collection that is being displayed.
For the actual webpages, I decided to keep it relatively simple. On the main page (with a list of collections), each thumbnail image is cropped into a square, and displayed with a basic title for the collection. On each collection's page, images' aspect ratios are maintained, and they are shown in a few columns. You can click on an image to enlarge it, which shows the lower quality version until a simple JS script fetches the full quality version and displays that instead.
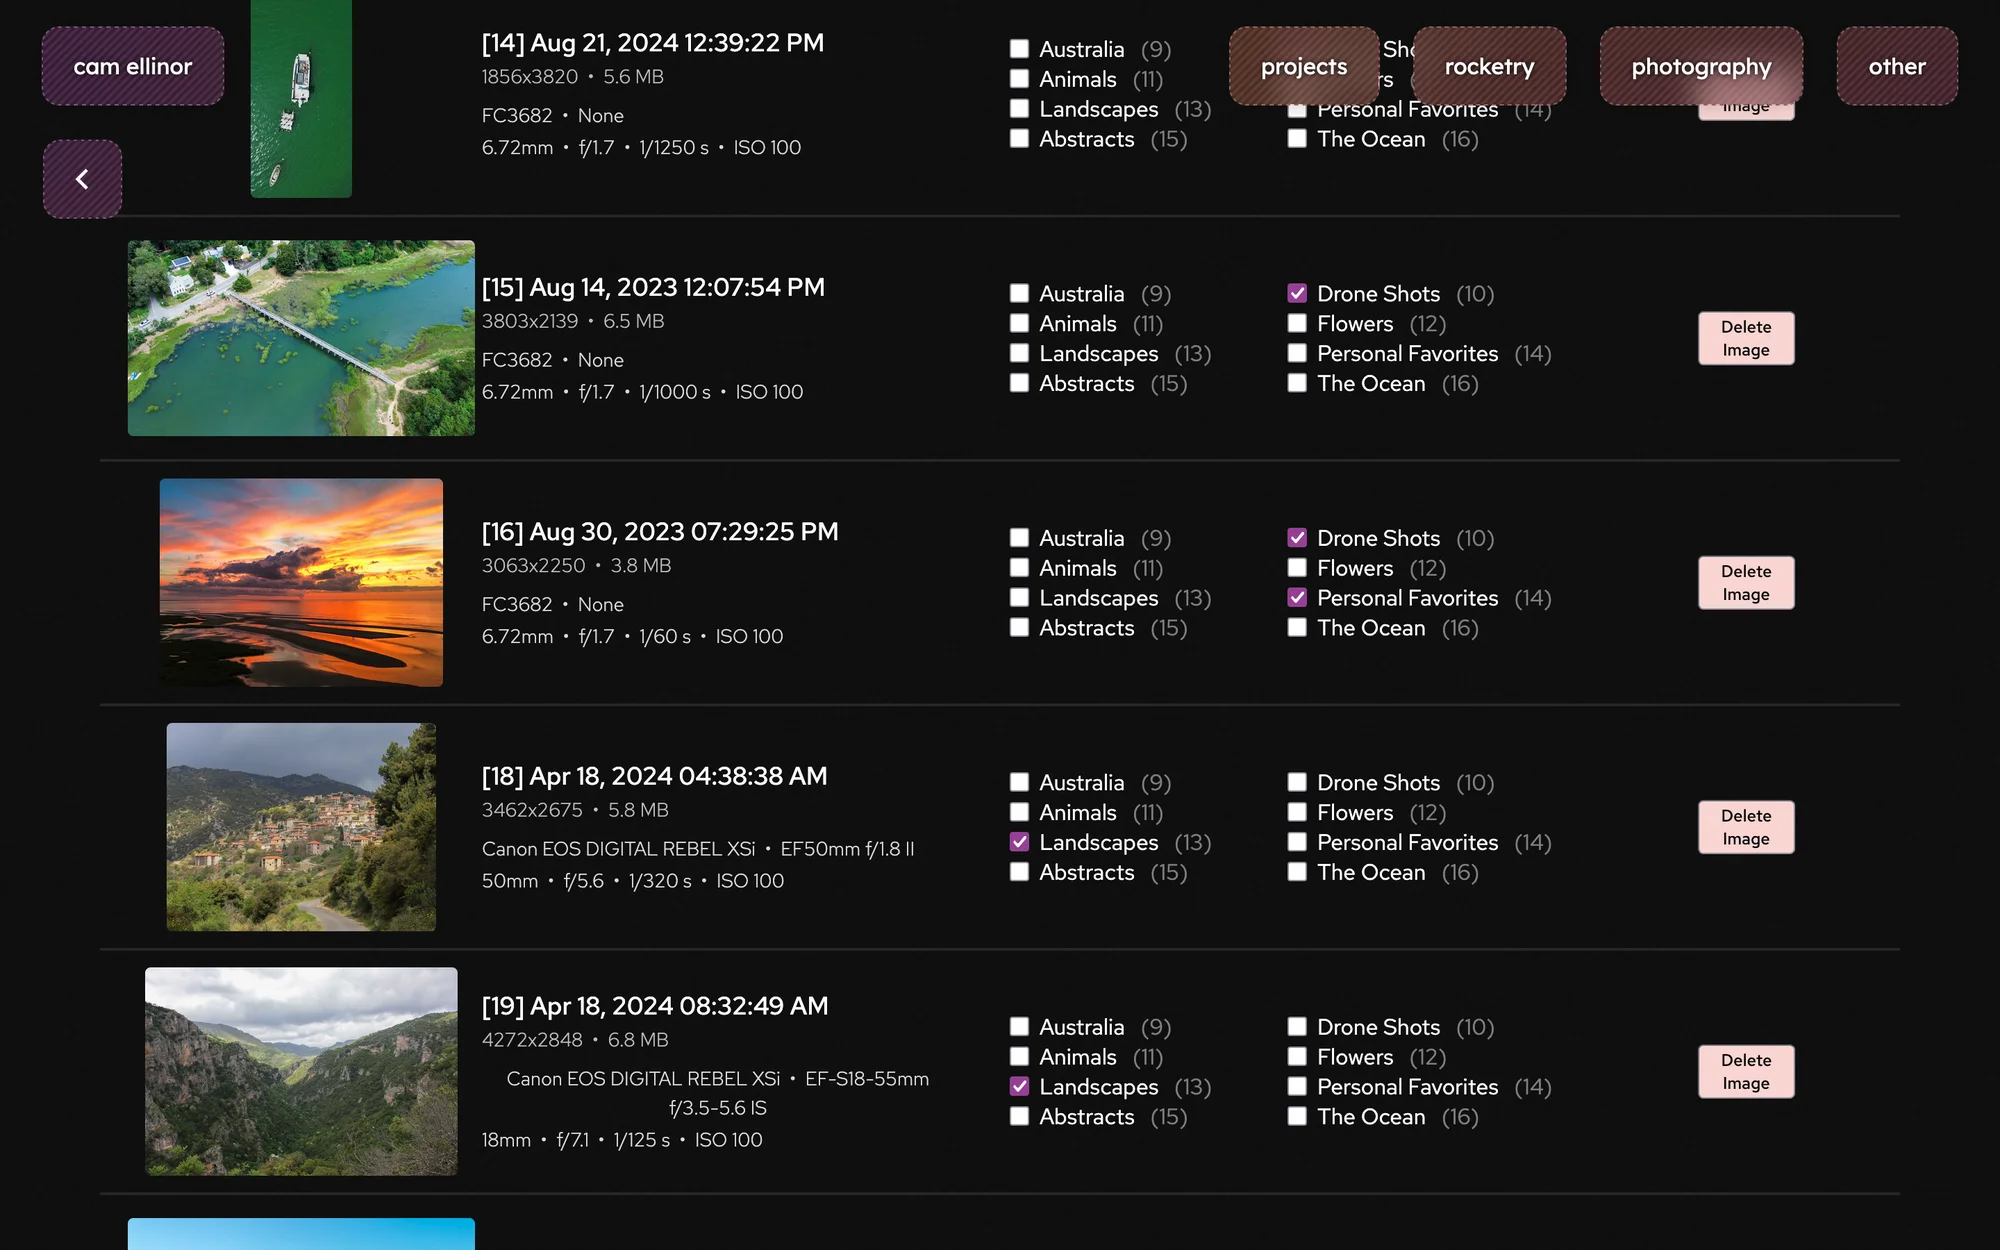
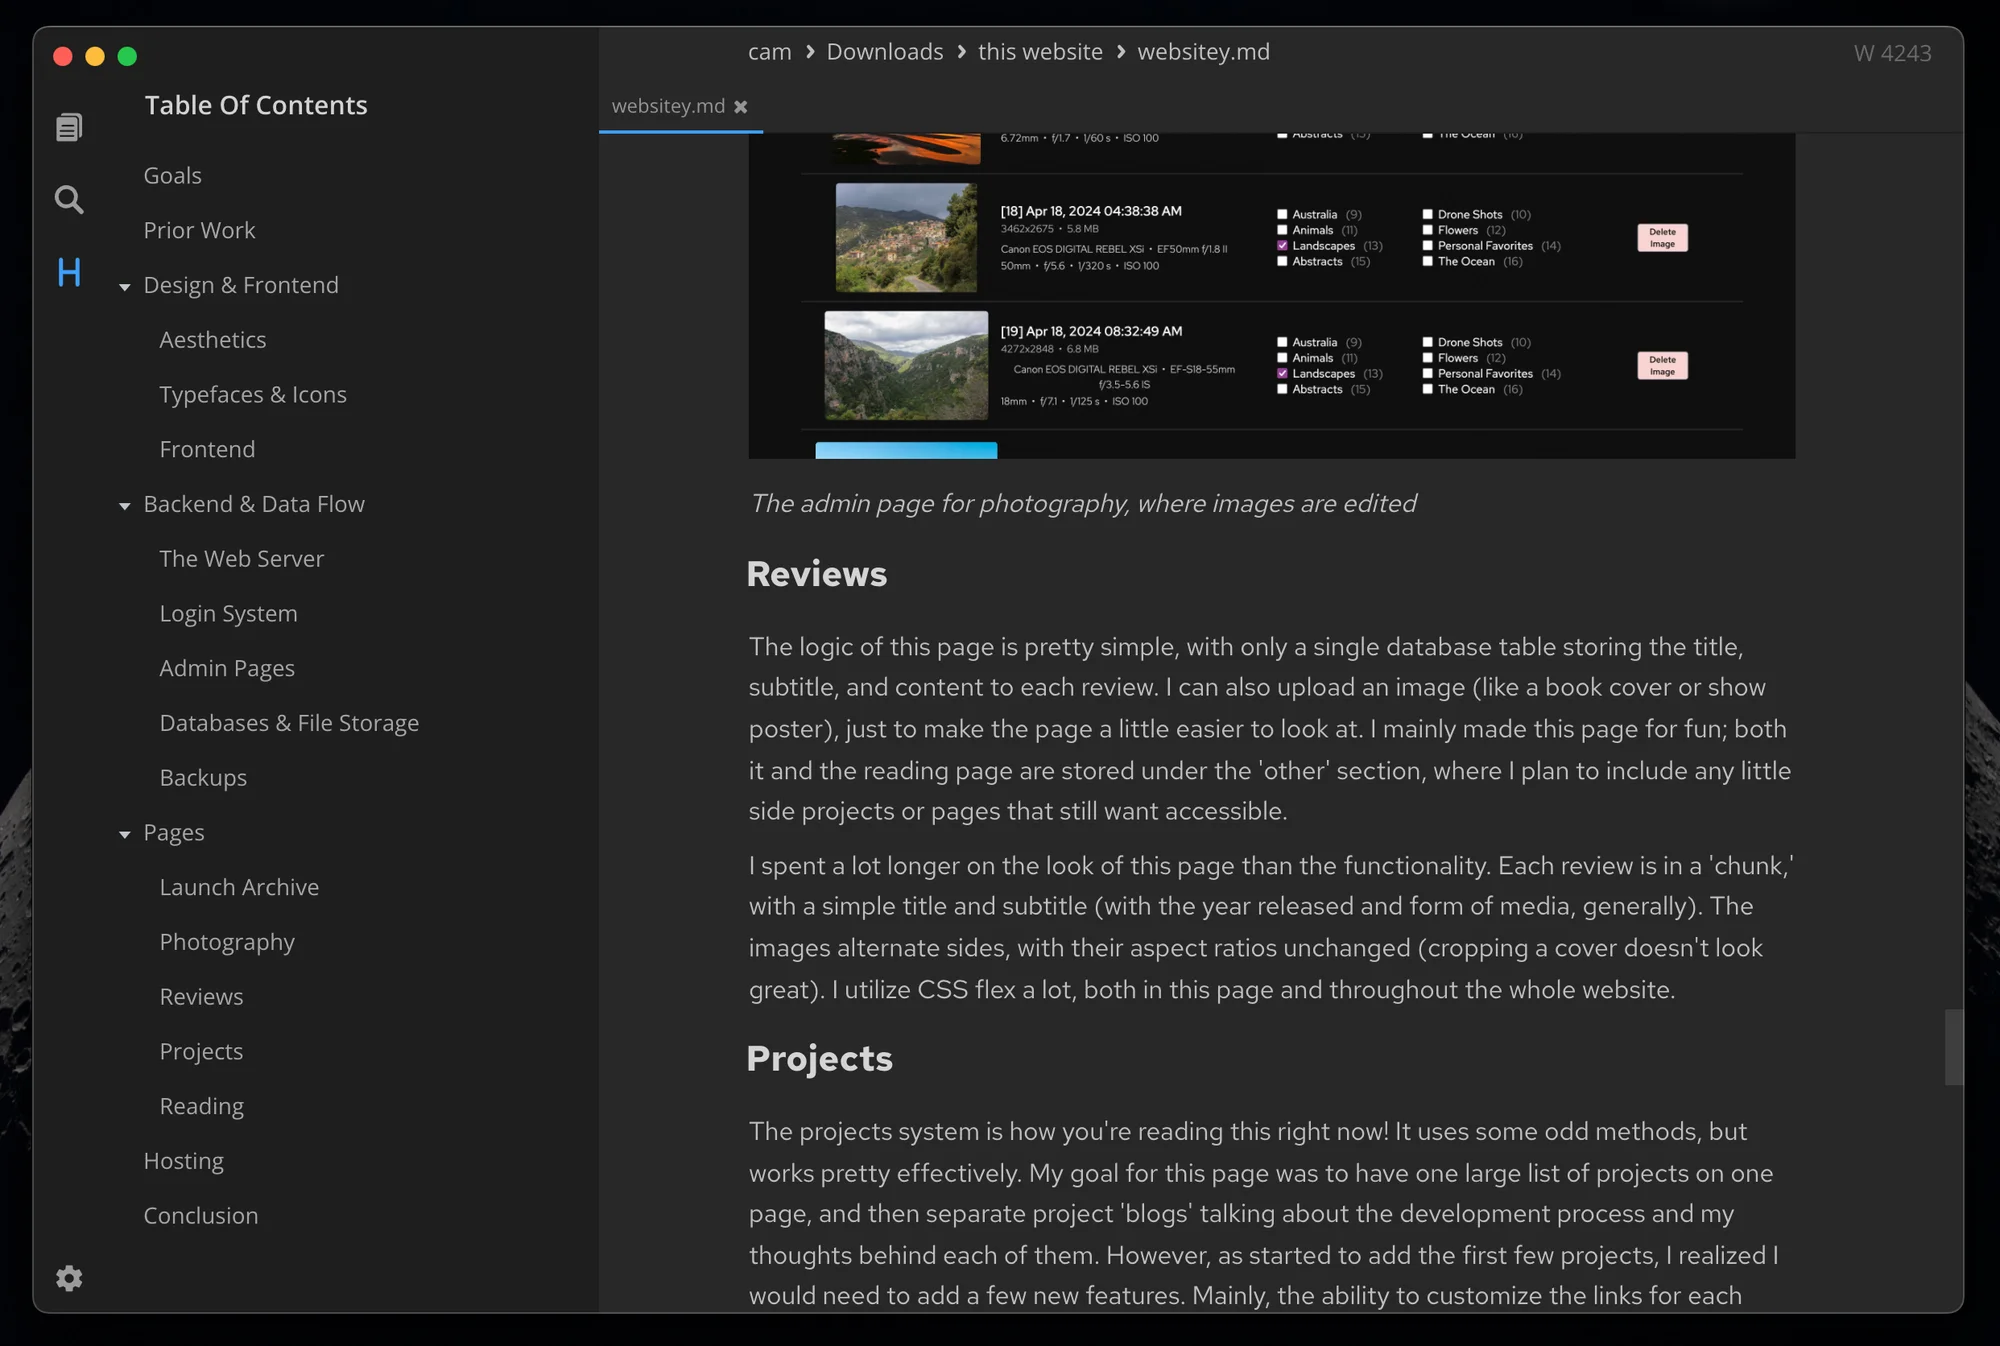
The admin page for photography, where images are edited
Reviews
The logic of this page is pretty simple, with only a single database table storing the title, subtitle, and content to each review. I can also upload an image (like a book cover or show poster), just to make the page a little easier to look at. I mainly made this page for fun; both it and the reading page are stored under the 'other' section, where I plan to include any little side projects or pages that still want accessible.
I spent a lot longer on the look of this page than the functionality. Each review is in a 'chunk,' with a simple title and subtitle (with the year released and form of media, generally). The images alternate sides, with their aspect ratios unchanged (cropping a cover doesn't look great). I utilize CSS flex a lot, both in this page and throughout the whole website.
Projects
The projects system is how you're reading this right now! It uses some odd methods, but works pretty effectively. My goal for this page was to have one large list of projects on one page, and then separate project 'blogs' talking about the development process and my thoughts behind each of them. However, as started to add the first few projects, I realized I would need to add a few new features. Mainly, the ability to customize the links for each project. At the start, I had only a single link that always linked to a blog. I changed this to be two customizable links, which can be used to go to a blog or demo, or to an external site.
For the backend functionality, I reused a lot of the reviews section. But for the project blogs, I needed to create a new system. I knew the blogs would need to have good formatting, and wanted them to be pretty easy to edit. For the formatting, I decided on using Markdown pretty early on. It allows for lots of flexibility in headers, gives options for bullet points and other lists, and has a wide support base. Making it easily editable was a lot harder. I didn't really want to build a custom Markdown interpreter, but I still wanted to be able to see what it would look like on the page as I wrote it. There are a few libraries that can do this on a webpage (which I could have embedded into my site), but thought that it might not be as reliable as something I did myself (and dealing with images is extremely difficult on something like this). After a bit of tinkering, I decided to make it an upload-based system.
For each project, I have a project folder stored locally on my computer. I contains a .md file which has the actual text, and then a subfolder /img to store any image files. I use MarkText to write the files (a lightweight markdown editor). It automatically stores imported image files to this subfolder, which makes the whole process a lot nicer. Once I'm done writing, I can upload the full folder through the Projects admin page. The server uploads this folder to a general /projects folder, and then processes the markdown file into an HTML file (using the Markdown python library). This HTML is then used as a block in a project blog Jinja template, to make the format and styles uniform.
Editing this project blog in MarkText
Reading
This page was one of the most fun (and irritating) to make. It acts as a live reading long, displaying books I've read previously and what I'm reading at the moment. It connects to my jailbroken Kindle, allowing me to upload ebook files and track my reading progress. After I had gone through the process of jailbreaking my Kindle, I wanted an easy way to upload ebook files. I also had been tracking the books I've read (for the past year or so) in a reading log, and thought it was cool to have a list of books I've read. So, I decided to spend far longer to automate the process than I would have ever spent manually doing it.
I started with the book uploads, by making an input on the reading admin page. This uploads the file to a folder on the Raspberry Pi, called Books. I use a plugin for KOReader (the ebook reader that I use on my Kindle) which integrates a peer-to-peer file synchronization service called Syncthing into the Kindle. I connected the Books folder on the Pi to KOReader's home folder, meaning that whenever I upload a book to the web server, it syncs to the Kindle within a minute or two. This folder is one-way, so the Kindle can't make any changes to the Pi's folder (mainly to avoid any mismatches in the devices, which kind of breaks the system). KOReader stores its metadata—including all book information like title and author, and user information like reading progress and rating—in a separate system, which mirrors the main filesystem. When a new book is added, KOReader generates a metadata file for the file, and updates it as the book is read. I have set up this folder of metadata to sync the other way (also using Syncthing), meaning all metadata is sent to the Pi, in essentially real-time. This means I can find the metadata for any given book (all book files are stored with unique IDs, which the metadata files also use), and after parsing that information, can use it on my site.
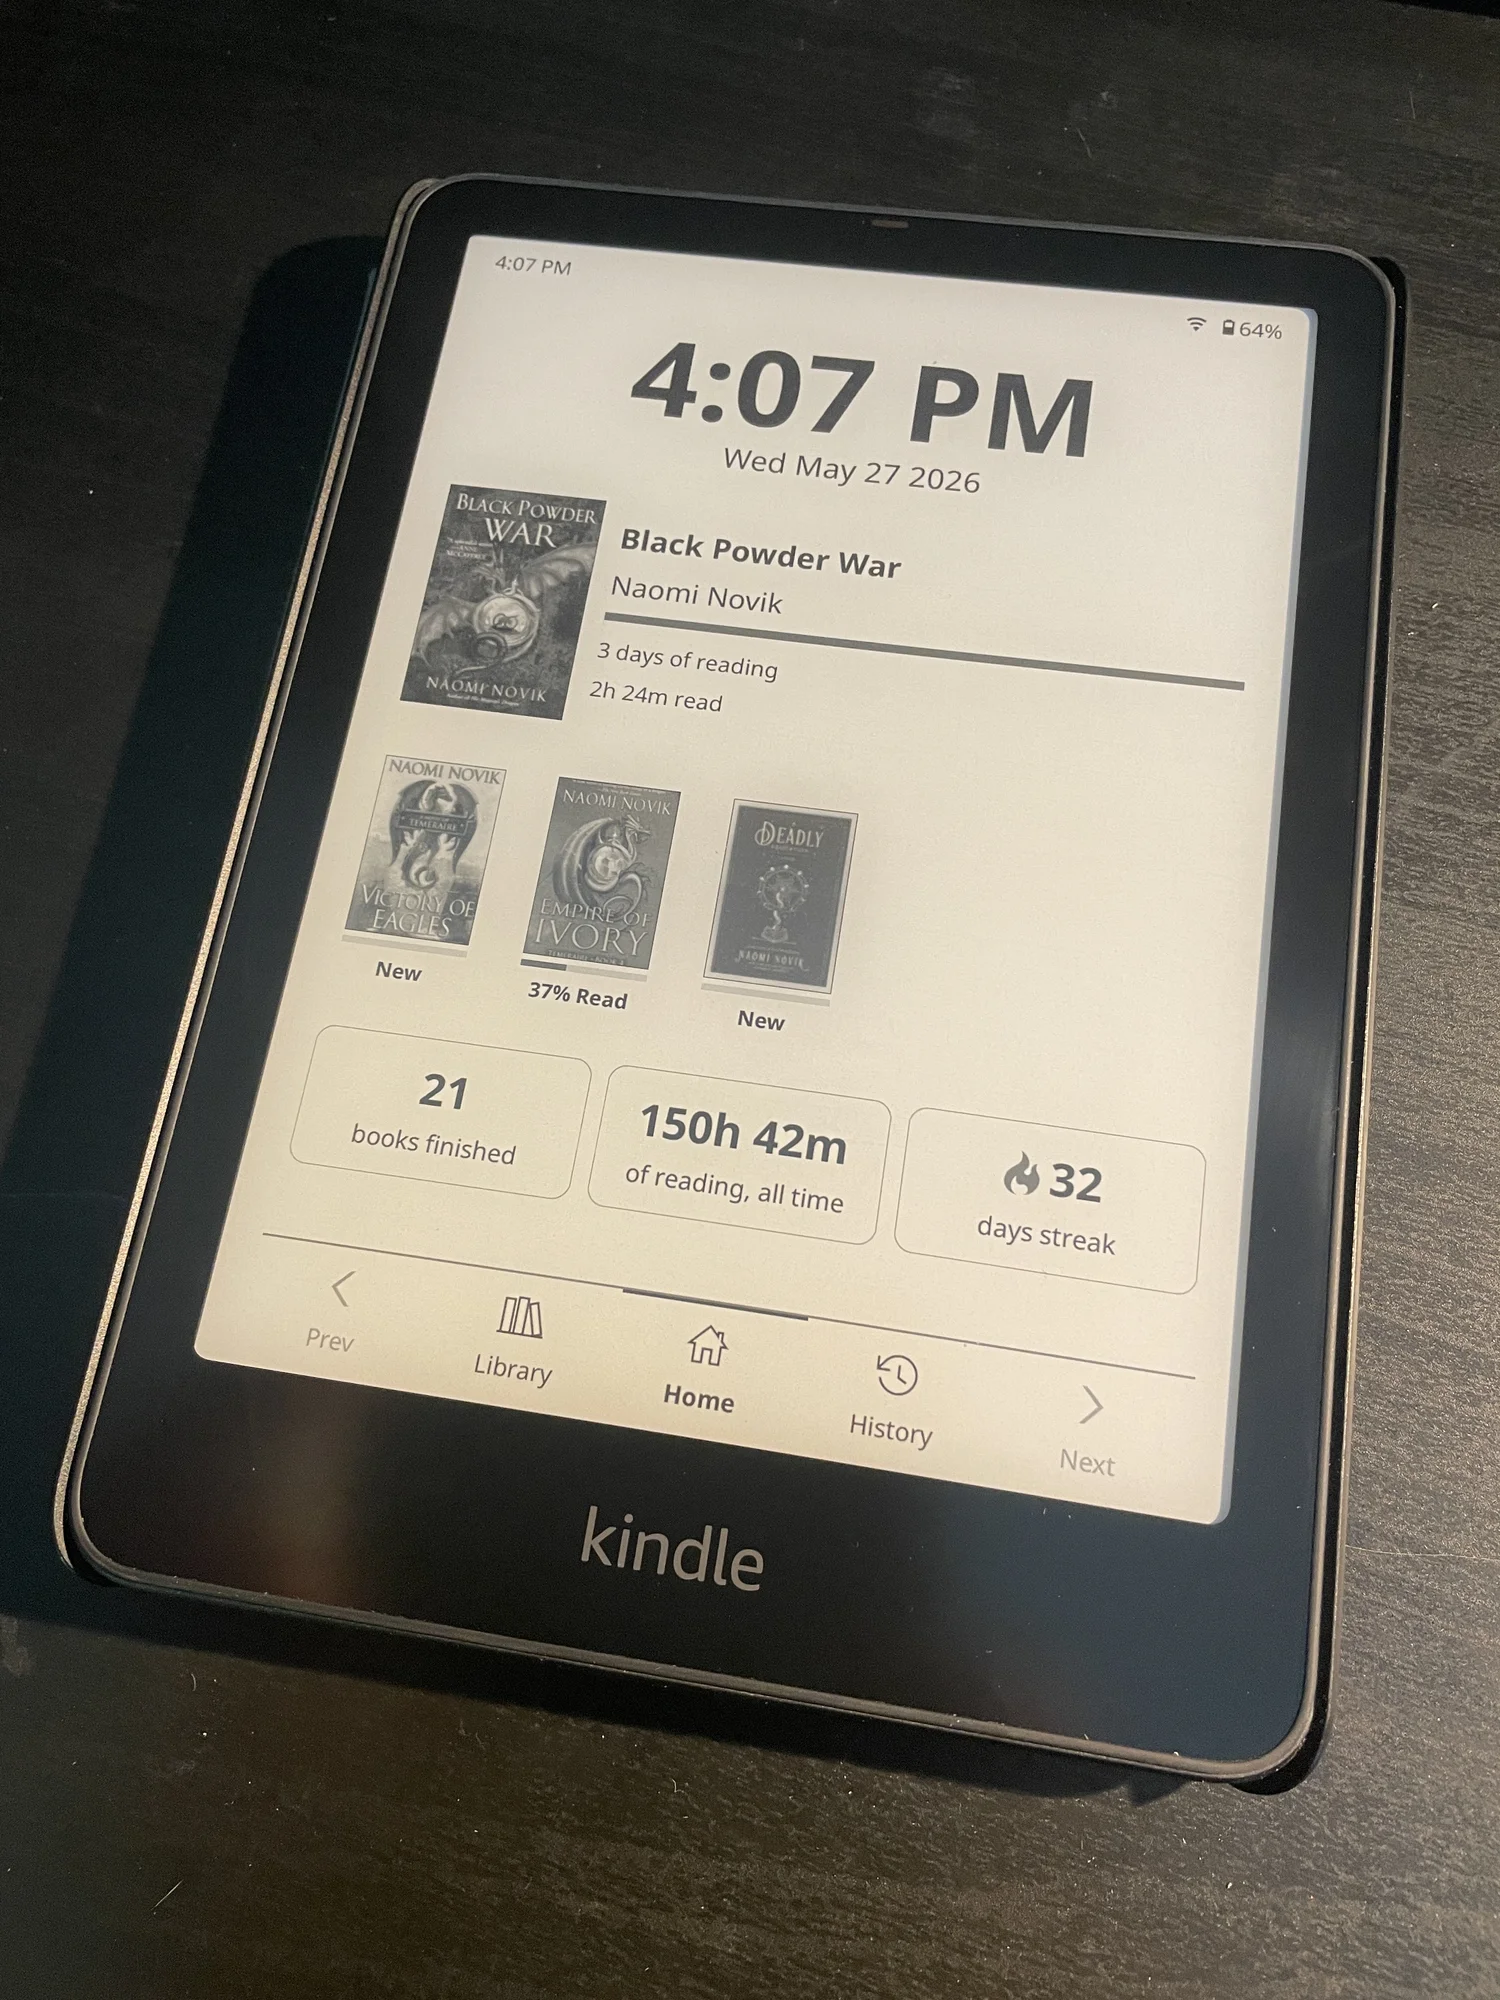
My jailbroken Kindle!
This is how I get the information about each book. KOReader also lets me store a 'status' for each book, either reading, finished, or abandoned. I display each book that is currently being read (and with progress above two percent), along with its cover (which is also stored in metadata). For every finished book, I add a table entry that includes the book's information, and the dates I was reading it. These dates are stored in a separate database, as KOReader doesn't track reading times. I just see which days each book had the reading status, and when it changes to finished. These values can also be edited, just in case something happens (like I read something while the server is down). Although this was really interesting to make, and I love seeing the reading log grow, making it work reliably was a decent challenge.
Hosting
From some earlier projects, I had a Raspberry Pi 5, which I wanted to host the site on. While it is certainly not as reliable as using something like Google Cloud to host it, I thought it would be a pretty fun process (I'm not entirely sure why I thought this—the Pi's OS corrupted a few days ago and I had to recover the files and move them into a fresh install). It runs Raspberry Pi OS, just because it is an easy desktop environment (and I was not super excited about learning how to navigate a fully CLI OS).
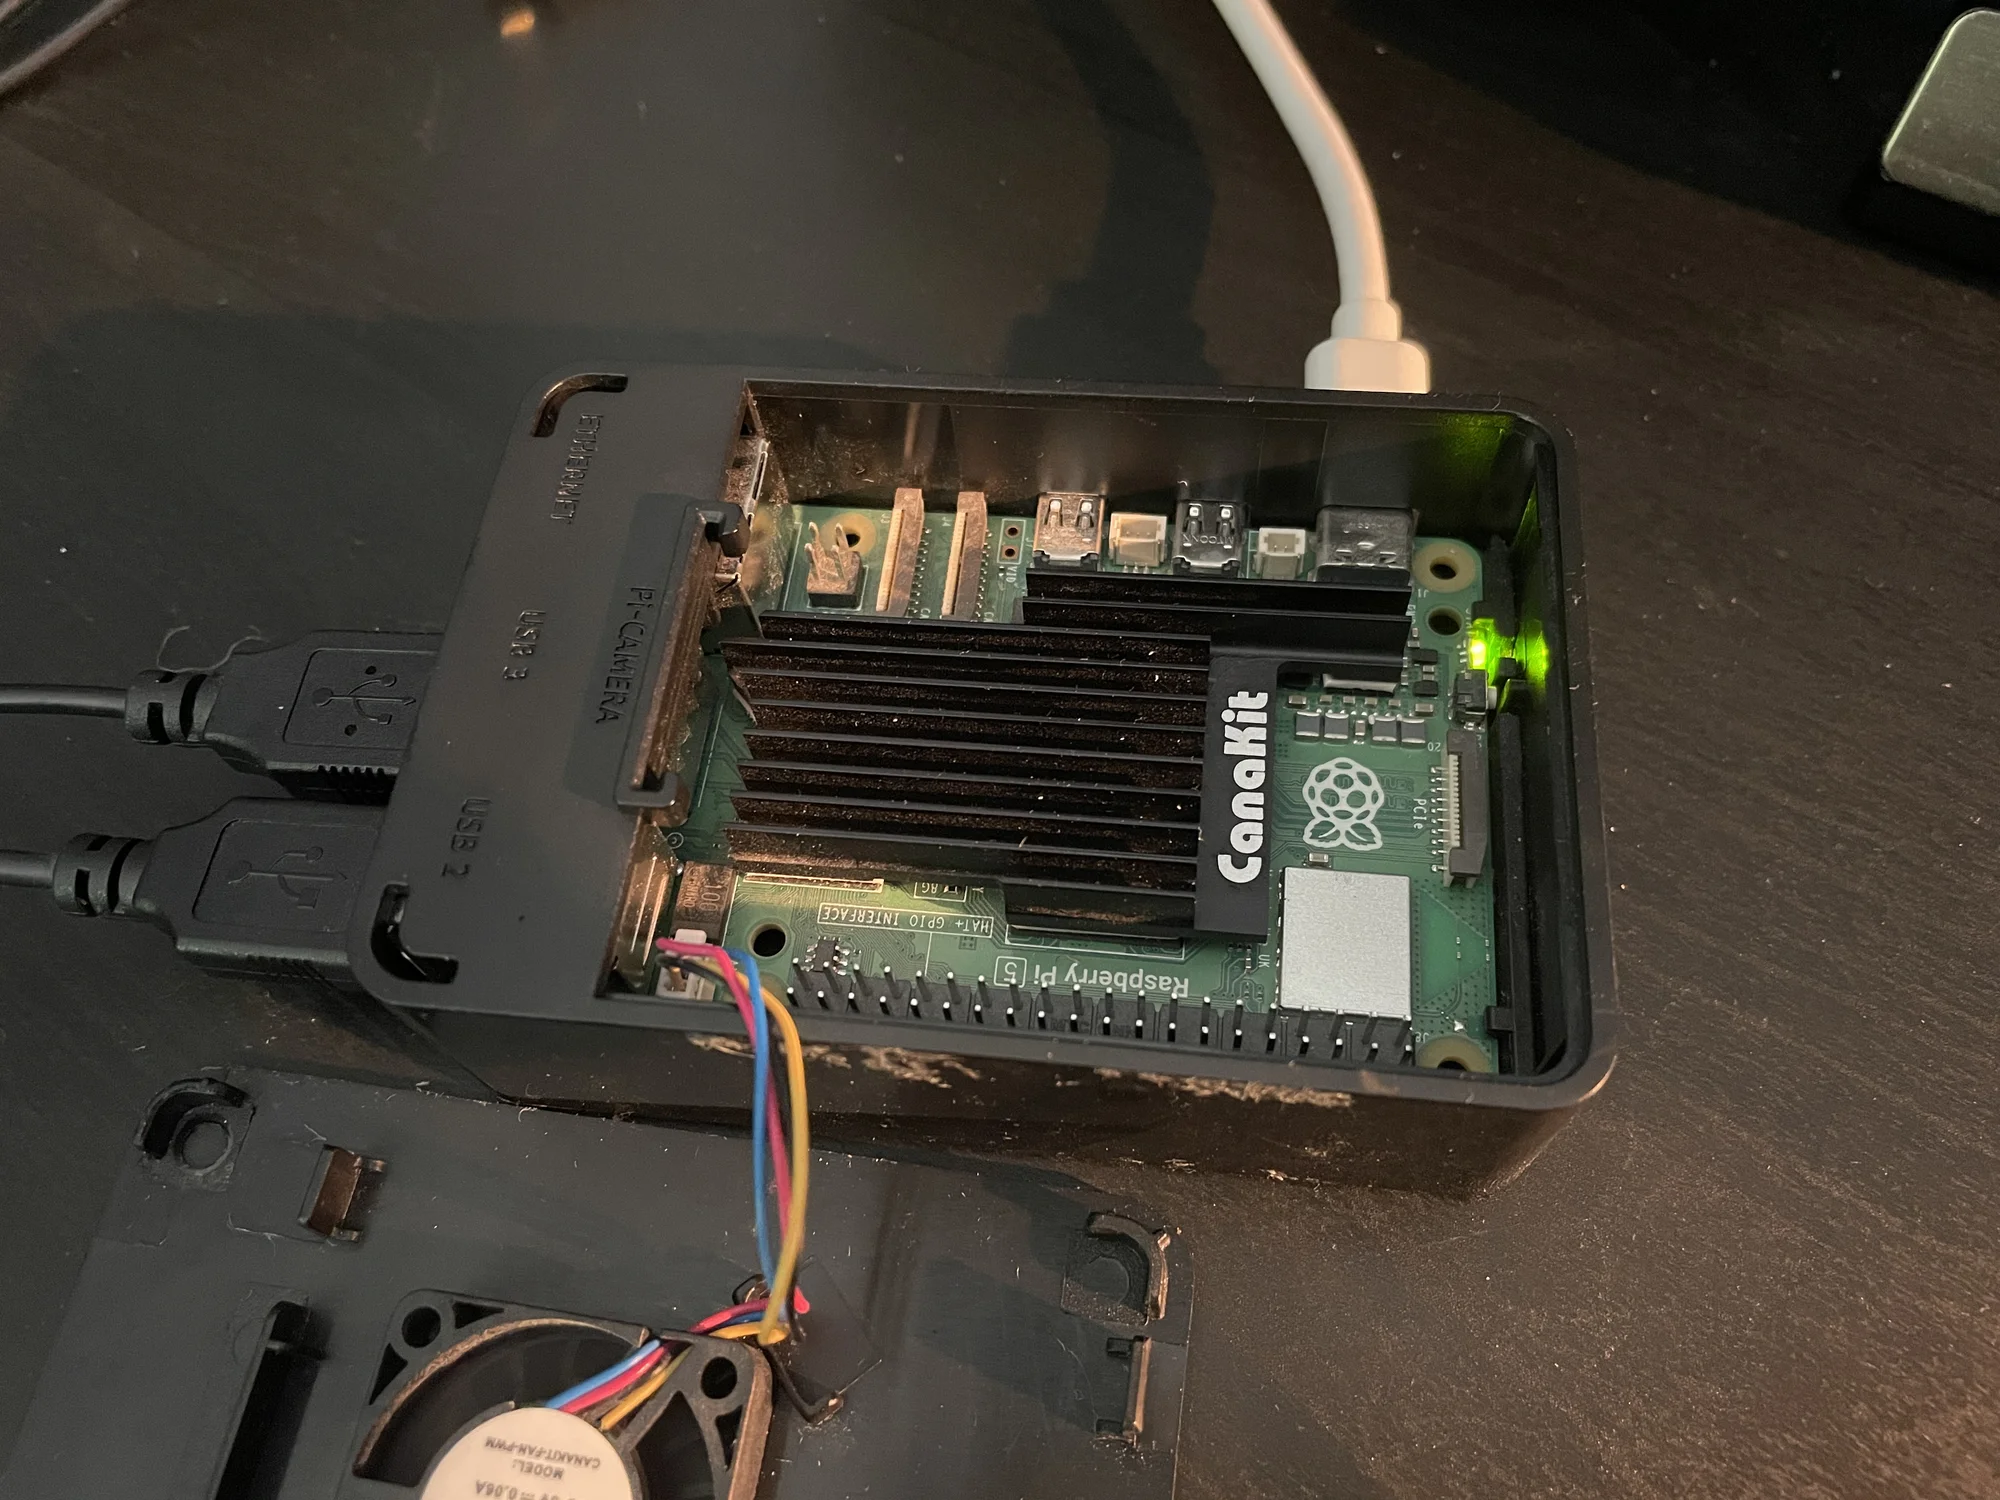
My Raspberry Pi 5, where this website lives
The production server uses Gunicorn, as it works fully with Flask. Both this server and Syncthing are run as daemons and start at boot, making it as reliable as a Pi can really be. I use a small bash script to pull any updates from the GitHub repo, and then restart the site. This script can be triggered by the web server in two ways: either a logged-in user can click a button directly on the site, or a GitHub webhook sends a request to run the script, whenever someone pushes to the repo.
Conclusion
This project was a ton of fun. It is probably the single thing I've spent the most time on, in the past few months, doing everything from designing a nice gradient to changing margins by a pixel. It was really interesting to learn about the workings of websites, especially how pages change and how web servers interact with databases. I'm quite happy with the result, and although there are still one or two bugs, I think it turned out very nicely.
A lot of the stuff I've written about here is pretty basic (to web developers or other coders), but I think it was fun to talk about. Even if it's way to detailed, or skips a bit in a few places, I enjoyed writing a little about my process.